
Your cart
There are no more items in your cart


Are you ready to give your kitchen a fresh, new look? Look no further than The Online Tile Shop! In this blog, we'll dive into the different types of tiles available, guide you through the process of properly tiling your walls and floors, and share tips on keeping your tiles looking their best.
Our Kitchen Tiles
When choosing tiles for your kitchen, of course it's important to think about how they look, but it’s almost equally as important to make sure you consider how easy they are to clean, to ensure they stay looking as good as new for many years to come. You want tiles that are tough and simple to wipe clean so that your kitchen stays in good shape and is easy to keep tidy every day. With so many colours, designs, and textures to choose from, selecting the right tiles is key to making your kitchen not just a cooking space but a reflection of your style and how you live.
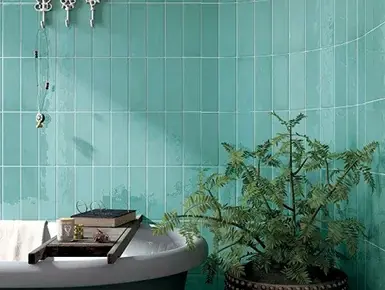
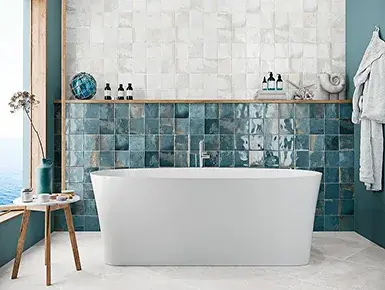
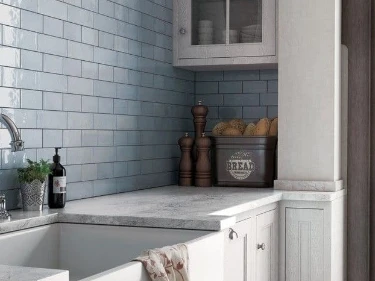
Our range spans various sizes, from the compact Alfaro tiles perfect for intricate layouts to the expansive Lecco tiles that bring classiness to larger spaces. Colour options are equally varied too, with the collection boasting various hues from the earthy tones of Artistic Sage Green and Country Blanco to the vibrant Manacor Glacier Blue and La Riviera Rose Pink. These colours offer the flexibility to complement a natural, understated kitchen palette or introduce a bold statement piece.
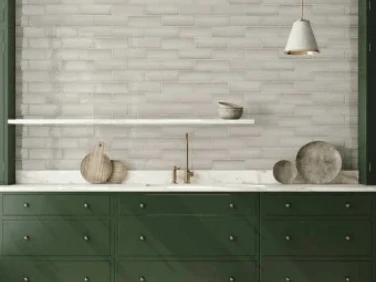
In terms of style, our tiles range from the rustic charm of the Country range, ideal for those seeking a traditional kitchen feel, to the Art Nouveau Folies Bergere tiles, which make a striking impact with their distinct patterns and glazed porcelain finish. The La Riviera range adds a touch of glitz and glamour with its bright colours and rippled finish, perfect for anyone looking to infuse their kitchen with a lively, artisanal effect.
Alternatively, the range of Lecco tiles demonstrates how subtlety can be equally impactful, offering a sophisticated backdrop that enhances the kitchen's overall design without overpowering it. Meanwhile, the Manacor Blue Moon tiles introduce an artisanal effect with their glossy pastel colours and subtle tonal variation for those looking to incorporate handcrafted elements into their kitchen.
Tiling a kitchen is a multi-step process that involves careful planning and execution to ensure a durable and aesthetically pleasing result. So we’ve put together a detailed guide to help you tile a kitchen effectively:
Prepare The Surface
Clean the Surface:
Ensure that the kitchen walls or floors are free of dust, grease, and debris. Then, any existing tiles should be removed, and the surface should be smooth and even before anymore work starts.
Level the Surface:
Check for any uneven areas and use a levelling compound if necessary to create a flat surface for tiling.
Materials and Tools
Select the Right Adhesive:
Choose a tile adhesive that is suitable for the kitchen environment. For most kitchen tiling projects, a cementitious tile adhesive (Class C1 or C2) is appropriate due to its strength and resistance to moisture.
Gather Tools:
You will need a notched trowel for applying adhesive, a tile cutter for shaping tiles, spacers for even gaps, a grout float, and a sponge for cleanup.
Planning the Layout
Dry Layout:
Arrange the tiles on the floor or against the wall without adhesive to finalise the design and determine where cuts will be needed.
Measure and Mark:
Use a level to create reference lines for a symmetrical layout. This will guide you during the adhesive and tile application.
Applying The Adhesive
Mix Adhesive:
If using a powdered adhesive, mix it with water according to the manufacturer's instructions. For premixed adhesives, simply stir the contents.
Apply Adhesive:
Starting at your reference line, spread the adhesive with the flat side of the trowel, then comb it with the notched side to create uniform ridges
Setting The Tiles
Cutting Tiles:
Use a tile cutter to trim tiles as needed to fit around cabinets, appliances, or other obstacles.
Place Tiles:
Set the tiles onto the adhesive with a slight twisting motion to ensure good contact. Use spacers to maintain consistent gaps for grout.
The Finishing Touches
Clean Excess Grout:
After grouting, wait for the grout to set slightly, then use a damp sponge to clean off any excess from the surface of the tiles.
Curing:
Allow the grout to cure fully (which typically takes 24-48 hours) before exposing the tiled area to moisture or heavy use.
Seal Grout:
Once the grout has cured, apply a grout sealer to protect it from moisture and stains, especially in areas prone to spills and splashes.
Grouting The Tiles
Choose Grout:
Select sanded or unsanded grout based on the width of your tile joints. Sanded grout is suitable for wider joints, while unsanded grout is best suited for narrower ones.
Mix Grout:
Prepare the grout according to the manufacturer's instructions, aiming for a peanut butter-like consistency. This consistency ensures that the grout is easy to work with and helps achieve a smooth and uniform finish when filling in the gaps between tiles.
Apply Grout:
Use a grout float to press the grout into the joints, moving diagonally across the tiles to avoid pulling grout out of the joints.
By following these steps, you can achieve a professional-looking tile installation in your kitchen. Or if you prefer to digest these tips and instructions in a video instead, you might find a YouTube tutorial can help.
How to Remove Kitchen Tiles
To ensure a smooth and safe removal process, it's important to prepare for the process appropriately and be patient too. Here’s our concise guide to help you remove your kitchen tiles safely and effectively:
Wear Safety Gear:
Before you start, make sure you protect yourself with safety goggles, gloves and a dust mask to prevent inhalation of dust and debris.
Loosen the Grout:
Use a grout saw or an oscillating tool with a grout removal blade to carefully cut through the grout around the tiles. This step is crucial for minimising damage to the surrounding tiles that are not being removed.
Hammer and Chisel:
Position a chisel at the edge of a tile, angled slightly towards the space beneath it. Gently tap the chisel with a hammer to lift the tile. Start from the outer edge and work your way in to avoid breaking the tile if you intend to reuse it.
Use a Floor Scraper:
Once you've removed the bulk of the tiles, use a floor scraper to clear away any adhesive or remnants from the substrate. This ensures a clean, smooth surface for the new tile installation.
Be Patient:
Rushing the tile removal process can cause unnecessary damage to the substrate or result in injury. Take your time to methodically remove each tile, especially in areas where they are stubbornly adhered.
Is It Possible to Tile Over Kitchen Wall Tiles?
You don't have to rip out old kitchen tiles every time. Adding new tiles over the old ones can be a simple way to update your kitchen without a big renovation project. Just remember, it works best when you check a few important things first:
Assessment:
Begin by examining the current tiles to ensure they're securely attached to the wall. Loose or damaged tiles can compromise the new installation, leading to longer-term issues.
Surface Preparation:
The surface must be even and clean. Any grease, dirt, or soap residue can affect adhesive bonding. A thorough clean and slight sanding can improve adhesion too.
Damage Evaluation:
Ensure there's no significant damage to the underlying tiles. Cracks or chips can affect how well the new tiles adhere and may indicate issues that need addressing.
Height Considerations:
Before starting, assess any potential height differences the new layer of tiles might introduce. This is crucial around areas like counters, appliances, and fixtures. Adjustments may be necessary to ensure a seamless integration with the rest of the kitchen.
You can tile over old tiles in your kitchen to save time and money. It's a good option if the old tiles are in good condition, the room is available for the new layer of tiles and you want to avoid the hassle of removing them. This way, you get a smooth surface to work on and can create a new look without a lot of effort or expense. Just make sure the old tiles are firmly attached and clean before adding the new ones.
How to Clean Kitchen Floor Tiles
To keep your kitchen floor tiles looking great and lasting long, you need to take care of them regularly. This means sweeping or vacuuming to remove dirt, cleaning up spills promptly, and mopping with warm water and a neutral cleaner at least once a week.
For the daily upkeep of ceramic and porcelain tiles, a solution of mild detergent and warm water is effective. It’s essential to choose cleaning agents that are gentle to preserve the tiles' finish and prevent any potential damage. Natural stone tiles, however, demand specialised cleaners that cater to their unique composition to avoid any harm.
In addition to regular cleaning, a deeper cleaning is periodically required to tackle more stubborn stains and build-up. A concoction of baking soda and water can be particularly useful for this purpose. This natural solution works well on all tile types, lifting stains without the need for harsh chemicals.
Revamping your kitchen with tiles offers a blend of beauty, style and practicality. Whether you’re installing new tiles or revamping or maintaining your existing kitchen tiles, we hope our collection of guides will help you revitalise your kitchen. But if you’d like to know more, take a read through our helpful blog or get one step closer to your dream kitchen with our wonderful range of tiles.